Sunday, 14 August 2016

Disc Dyes III

Disc Dyes III
After the success of the last few times, I wanted to push the limits a little more with a few different ideas.

Spin Dyeing

Spin Dye DD Lucid Felon, offsetting the centre along a line
I picked up a record player from the green shed, cut the power cable and supplied it with 12 volts. I mixed my dye jars with 50% acetone, and tried out a few ideas. I think there is some decent potential for a combination of stencils and spin dying, and I still want to find a way to do confetti style dyes, I'm thinking a toothbrush to spray the dye on to a spinning disc, possibly with a fan to help get the streaks to occur. I read on reddit that one guy does them using a shaving cream layer, and then adding the powder from a dye packet, which sounds interesting too.


Spin Dye DD Lucid Verdict, concentric rings


Tri-colour disc dye

Tri-colour stencil, Gold line Lat 64 Fury. 
Latitude 64 - Gold-line Fury. This was a nice white disc, a rather under-stable fairway driver, and one that I tend to use as a roller as well on a few of the Eddison park holes that have low fairways through trees near the middle of the hole. 

It was about the release of the new Star Wars movie, and the hype surrounding BB-8, and I'd seen a few dyes using the droid as a stencil, and decided to follow suit. It turned out quite nicely


Sunday, 7 August 2016

DM screen

I'm starting to play DnD again, and among the other challenges including the rule
changes from 3.5E to 5E),and a new group, I'm also DMing, at least for a
little while. I'm starting out with the written adventure 'Mines of
Phandelver', which means I have to have a few things handy as reference
materials, as I'm nowhere near as immersed in the setting as I would be
had I written the setting, which means I'm planning on using a DM screen
for the first time.

In the past I've had a laptop available, for looking up rules and as a
bit of a screen, but the transition to tablets means it's more practical
to use one of those as a rule supplement, and minimises clutter on my
desk. The DM screen is merely to prevent accidental glances at my notes,
and to keep all of my stuff together between sessions, and potentially
conceal dice rolls if need be to keep characters alive, or increase
tension.

Requirements

- folds and stores all the session info
- usable at a 2 page spread
- holds 3-4 A4 pages of notes
- not too high/able to be seen over/knocked flat, I hate DMs that seem apart from the table.

Execution


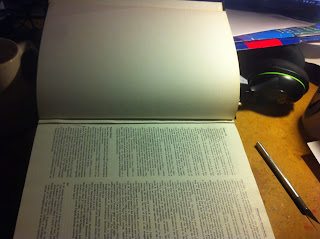
  • I've got a pile of old 1980s Encyclopedias, which I've used for a variety of purposes, and the cover is perfect for this task.
  • I removed the pages of the book, leaving the covers and title pages.

  • To give the magnets something to stick to, I glued magnetic plates between the title page and the cover,

  • The magnets hold papers, my ruler and other things in place as necessary


Friday, 5 August 2016

Bike Rack

Bike rack

Build notes is a post in which I provide ideas, plans and the execution
of some kind of construction.

In the new place we don't have a lot of room in the shed, and it's not
all that secure, or easy to remove things from. This combination means
that keeping all four bikes in the shed would make it pretty hard to get
out of the house on time to get to work.

It's about 6km to and from work for both of us, so the road bikes are
going to be the commuters. The mountain bikes will live in the shed, as
they can be a little harder to get at.

The house has a small foyer/hall area just inside the front door, that
isn't of much use, but is nearly big enough to store some bike gear. The
priorities are to have both bikes, and the assorted clothing and gear
easy to get to, in any order, but taking up as little space in the house
as possible. I saw a few examples of double bike racks on the web, and
decided to go with something a little simpler and plainer, and quicker
to build.

<h3> The design </h3>
A simple A-frame with a series of shelves, 2 of which are extended to
hold bikes by the top tube of the frame. There are a few additional
shelves to separate gear and keep things easy to find


<h3> The build </h3>
Build the two A-frames.

Cut the shelves to size.

Attach the supports for the shelves, making sure that they are level.

Screw the two main shelves onto the supports to hold the whole thing
together.

Add bracing where necessary.

Add padding to the shelves where the bikes will sit.


<h3> Thoughts </h3>
It's pretty well perfect, a little large for the space, but mostly
because the door opens the wrong way, and only to 90 degrees. It's
certainly made the process of getting to the second bike easier, and
keeps our gear separate.