Friday, 28 March 2014

Raspberry Pi Car Audio

Spontaneous Projects is a chronicle of all of my projects, a reference for me, and a way to prevent others from making the same mistakes. 

So I finally got myself a couple of Raspberry Pi's, so I'm trying to get my head around what they can do. 

To start off with I'm setting one up to act as an airplay speaker for my iphone, and probably a media server that plays a random selection of music. 


First thoughts

  • Using it without the SD card doesn't boot, just a black screen. 
  • I've installed Raspian, it's easy enough to set up for WiFi and general display etc. 
  • nano and leafpad work well enough as text editors
Setting up audio for the 3.5 jack not the HDMI port
amixer cset numid=3 1 
    3 2 will make it HDMI again. 
testing the output can be conducted through aplay file.wav for any wav files you can find.

Installing Shairplay

I used parts from here and here
Shairplay is an airplay emulator, and I've found installing it to be a bit of a pain, lots of older blogs and things, but nothing current.

first up, we need to update the apt-get functions, you'll probably need sudo privileges
apt-get update
apt-get upgrade

then install some basic dev dependencies for Shairplay, some may already be installed, but it can sort that out for itself.
apt-get install libssl-dev libavahi-client-dev libasound2-dev
apt-get install git libao-dev libcrypt-openssl-rsa-perl libio-socket-inet6-perl libwww-perl avahi-utils libmodule-build-perl 


Then install Perl, this might not be required, and can certainly be done later... I'll find out when I reinstall it at some stage.

cd perl-net-sdp perl Build.PL
sudo ./Build
sudo ./Build test
sudo ./Build install
cd ..


Finally we can install shairport


git clone -b 1.0-dev git://github.com/abrasive/shareport.git
cd shairport
./configure
make
make install

You'll be missing a few things, libao, PulseAudio, but they are not essential.

Run it using ./shairport -a 'NameHere'


Some Issues I had:
symptoms, Pi is visible as an Airplay device, but won't connect.
cause: lack of avahi, perl or libao, or some other dependency that is now added in the above code. I think it's the avahi mDNS, as forcing the use of tinysvcmdns causes the same issues. But I think this was caused by the lack of perl-net-sdp...

Thursday, 20 March 2014

Mechanical Movements and Ingenious Mechanisms

Spontaneous Projects is a chronicle of all of my projects, a reference for me, and a way to prevent others from making the same mistakes. 
This is a listing of a few pages that I wandered across and felt would be useful for future spontaneous projects.

I was wandering around the internet the other day, looking at crazy gears and the like... something I want to play with a bit more once I get my scroll saw back, but these were linked in the page.

These books are really interesting, out of copyright and should be useful for mechanical art pieces and the like

Five Hundred and Seven Mechanical Movements by Henry T. Brown, published 1868

Ingenious Mechanisms for Designers and Inventors Vol 1 by Franklin D. Jones, Copyright 1930
Vol 2
Vol 3
Vol 4 


The same site that hosts the Ingenious Mechanisms volumes also has a huge variety of docs, including instructions for making band saws, lathes and the like.
It's well worth a look


Wednesday, 12 March 2014

Spontaneous Etcher

Spontaneous Projects is a chronicle of all of my projects, a reference for me, and a way to prevent others from making the same mistakes.


Hole through a hatchet, masked with packing tape
Last night I was out with a friend, a bladesmith based out of Canberra, and he was discussing the need to place makers marks on blades to make a name for himself, which is easy enough on a fully forged blade using some punches when the blade is malleable. 
He's looking into doing a few cheaper blades, just ground down, so the risks of bending it, and the time consumed make punching inefficient. 

He mentioned Electroetching, using a DC current and some salt water, to remove iron ions from the blade, removing material and resulting in an etched blade. He's done a proof of concept before using a few 9v batteries, but felt that it was too dangerous, given how the batteries heated up. 


 I have a few old laptop chargers lying around, including a 19v, 4.67 A charger, that is unlikely to be all that useful for powering other things. 
So today we made up a new etcher, and tested it on a few blades; an old machete, a stainless cooking knife and a hatchet. 

By masking the area with nail polish, and scratching a design through the polish it is possible to create the design. The remaining area of the blade was protected with packing tape, while the positive electrode was clipped to the blade, and the negative attached to a ball of cotton wool soaked in a mixture of vinegar and salt.

The first design (left) was just a wordmark "Bruce !!!", and worked quite well in about 5 minutes with a heavily salted solution. However the area that was masked with polish was also etched slightly, due to uneven, or insufficient coverage. 

Emboldened we went for a more complex design, the bearded guy below, this was less successful, as the cotton ball had to be moved around to ensure good coverage, and the polish lifted in places. 


We decided to see what shape the process created below the surface with a deeper etch, and how long it would take, so a rectangle was masked out with tape, and a hole made through the machete - minimal heating of the power supply, despite working for over an hour to get through ~2mm of material in a 12x3mm rectangle. This required several cotton balls, a lot of electrolyte solution and a bit of movement to clean out the etched area occasionally. Not something that we'll want to do to blades, but a good proof of concept.

Wanting to make something a bit more practical, and test the process on a different material we tried a hatchet, cleaned up the rust a little, sanded it back, and made a design that will likely be similar to his final one, a Celtic knot, and his initials.

The photo doesn't show a lot of detail here, but the etching wasn't particularly smooth, possibly due to the design in the polish, or too aggressive a process, but it etched, and gave a recognisable mark.

The last thing to test was the behaviour of stainless steel, so a kitchen knife was etched, again the polish layer was a little thin, and we started off with no salt in the solution, but it was too slow.   Increasing the salt content increased the reaction rate, but it was still slower than the steel blades.

End result was promising, but we need to find a better way to mask consistently.

Thoughts:

  • Masking needs to be waterproof and possess high resistance
  • Masking needs to be held tight to the material
  • Timing is important, and will vary for different materials
  • A new switch is needed, and a new clamping method is desirable
Ideal masking will be plastic film, cut to shape in bulk, so either a sticker manufacturer, or one of the stamps that you can get at lincraft etc. 


Monday, 10 March 2014

Updates, and unstable flight

Spontaneous Projects is a chronicle of all of my projects, a reference for me, and a way to prevent others from making the same mistakes. 

I've ordered the programming cables for the KK2.1 and to program the transmitter, should be here in a week of three... in the mean time I've made the KK2.1 show the correct battery voltage, and I'm working on making it fly properly.


Battery Voltage

The KK board has a in built battery meter, that is meant to be fairly accurate, I haven't tested that yet as I need to replace my multimeter. Finding the information about how to wire it up is a little challenging, and apparently doing so backwards fries the board... 


The pins on the KK 2.1 are shown to the left. Note that the battery pins are inverted reletive to the buzzer, with the positive near the side of the board. 
It is not necessary to connect the negative, as the board is grounded through the ESC's and Reciever, so it is recommended that the negative pin is removed.

The positive battery wire can then be connected to the edge side pin, and you have a battery meter. By using the Battery alarm You will know when the battery is getting low, on my 3 cell (13.3v Batteries) I have the alarm set to Xv, and the motors cut out at X v


Unstable Flight

I still haven't fixed this, and now the LCD on the Board is dead, so there goes any hope of fixing it through the autolevel options.

The issue:
It gets up a little, and after a few seconds it just wobbles, and gets worse until it falls out of the sky.

Possible Causes:
  • The wind the last few days might be causing some issues
  • The board is not sending signals to the ESC's properly, or a motor is dropping out occasionally
  • The physical configuration 0-150-210 might need to be changed to 120-120-120
  • The motor mounts may be slipping around on the limbs a little, or the limbs may be shifting slightly
  • The PID settings need to be varied a bit, and then it'll fly like a dream
  • The board is getting too much vibration
What I've tried:
Waiting for a calm day is time consuming, so we'll skip past that till it happens, 

Signals to ESC's/motors, should be ok, and hard to test

The frame design shouldn't be an issue I think, it's similar to the last design, and the gyros should be able to stabilise it anyway. .

I've adjusted the auto level P gain values a little, but didn't get to stable, decreasing it certainly made it a little better, but not enough.
Further reading suggests that the PID settings elsewhere may help, this guide by FPVcentral in particular looks to be useful.

And now the LCD has died, no substantial crash or anything. The board still arms, so it looks like I just need to get a replacement screen and/or board, so I'll be doing that once I get some stable work. 


Next steps:
I'll try changing the foam and the board mounts to dampen the vibrations a little, and I might reconfigure the physical system to a 120 degree, and I'll definitely be locking the motors in place.
I have some programmers on order, so when they arrive I'll update the firmware. Other than that I think I'll be waiting until I can afford a spare board and a new LCD


It's interesting that I'm having so many issues with this, as other people rave about the stability of this board, I'll keep trying I guess, but I'm really looking forward to knowing enough about how the things work to build my own controllers, so I know what signals they are sending, where, why, and what is going on. I hate black boxes.


Saturday, 8 March 2014

Tricopter frame V2.0

Spontaneous Projects is a chronicle of all of my projects, a reference for me, and a way to prevent others from making the same mistakes. 

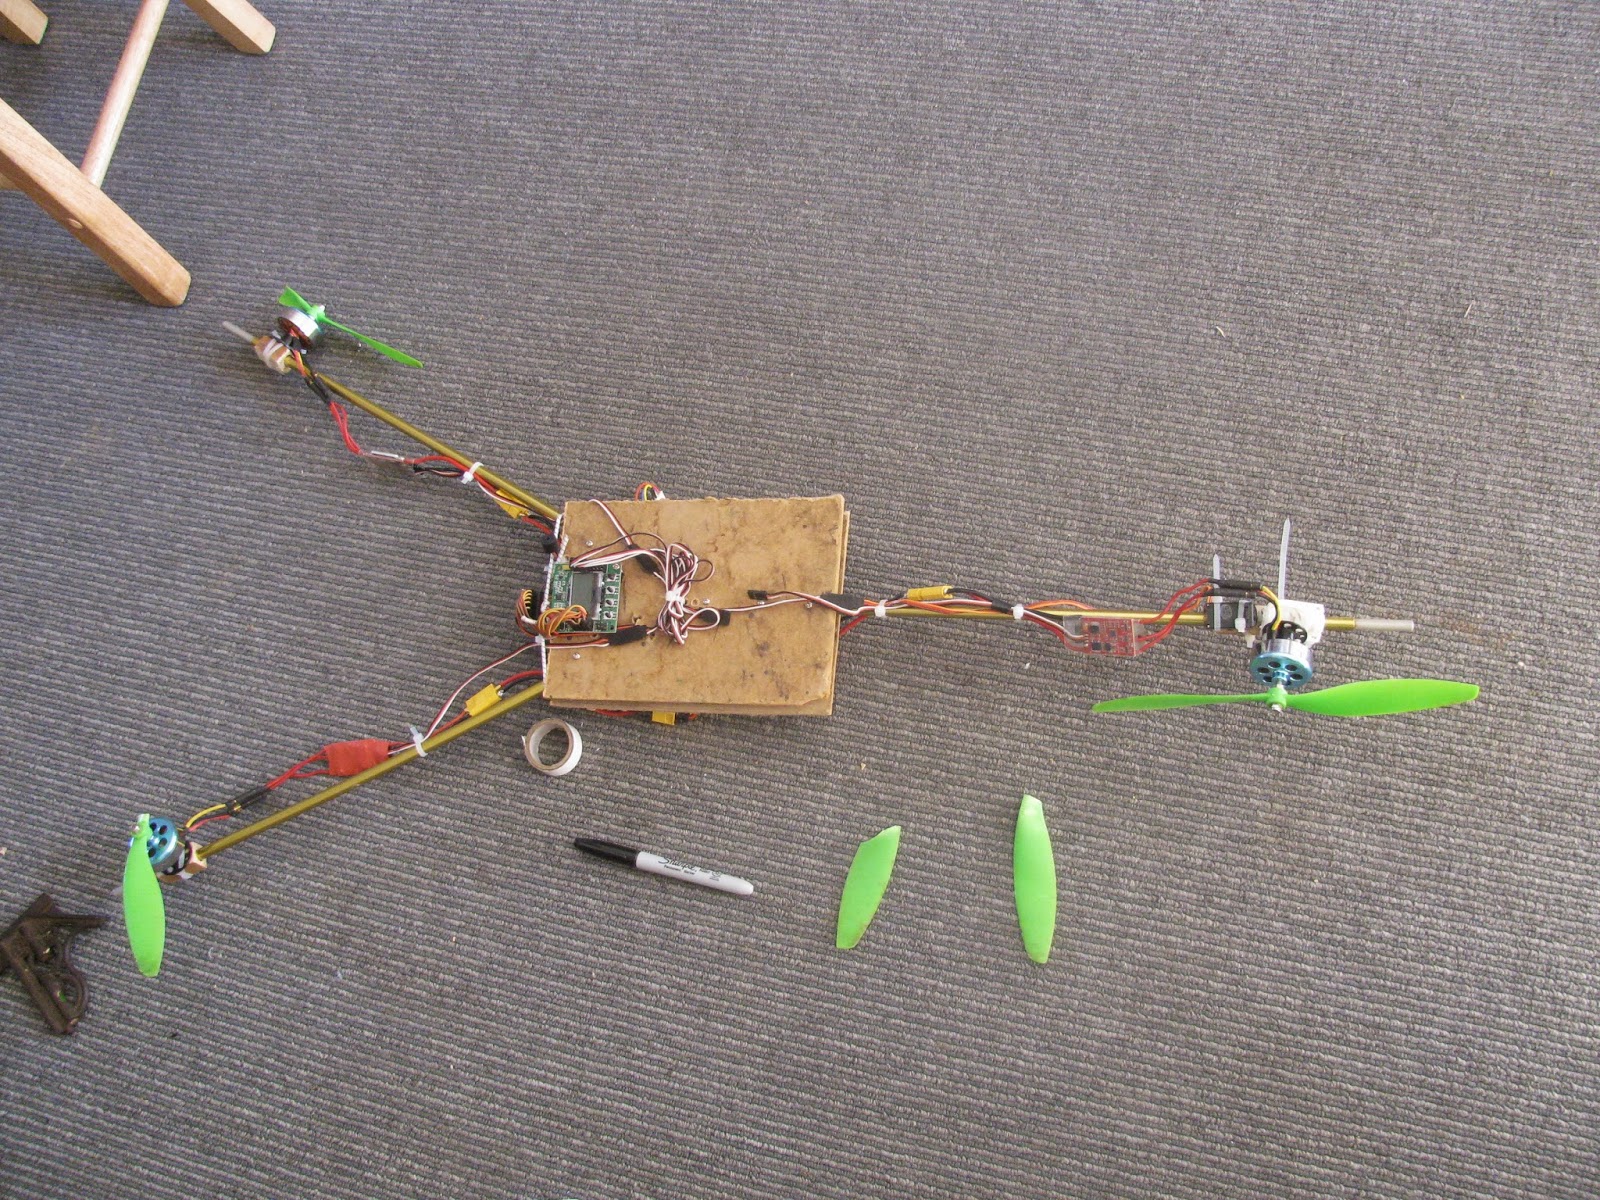
Given that the V1.1 frame keeps falling apart in every crash, was unstable in the air, heavy and difficult to carry I started on model 2.0. It's still made of bits and piece I had lying around, and there are a lot of improvements still to be made, but it seems to be a bit more solid. 
Just a few different options, old tent poles.

I have a lot of old aluminium tent poles lying around, that will make perfect arms, And I like the look of the foldable Tricopter design by David. The only suitable material I have though is some 3-4mm MDF... not ideal, but it'll work for a test run.
MDF with basic design, at the moment Arms are at 0, 150, 210 degrees.

Design at this point, with bolt placement


Attaching the poles is all pretty simple, on this prototype version I didn't really think about where everything else was going to go until the arms were attached, I'll do better on the next one. 
Two of the objectives of changing the design were to reduce weight, make it easier to carry and make the center of mass lower so that the tricopter is more stable. Basically, putting the battery under the frame.


I made it a little smaller

Fully packed up

Frame Only
Final Weight
v1.0
588g
1.37kg
v2.0
271g
1.04kg

I succeeded on all of these fronts, and once I get some better material for the plates I'll get it down a bit more, as well as increasing the strength and slimming the design down a bit. 

The two front arms are designed to pivot around and lock in beside the tail when not on use, this should mean that it can be packed inside some PVC pipe for transport into and out of a cave, or thrown in the back of a car. 

It's now taken a few crashes, as I still can't control it, and the frame has stood up well, so with some better materials I think it'll get even better.

Trying to keep the motors straight might be causing some of my issues, and I know some of the early ones were caused by the arms moving about. That was fixed by tying them together with shock cord... seemed to do an adequate job. 


I took a bit more time routing the wiring on this one, as I think that it'll be a platform to be tweaked rather than retired. At the moment it looks like this:
Top

Bottom


Edit: 2 hours later it looks like this


Not sure if it's the wind screwing with the auto level, but something is... I've tried dropping the P gain a little, but no cigar. Stick scaling I've seen mentioned somewhere, but seemed to do nothing... I'll post more when I get it to fly nice and stable... 


MindSumo Challanges

Spontaneous Projects is a chronicle of all of my projects, a reference for me, and a way to prevent others from making the same mistakes. 

The other day I wandered onto this interesting CV contest, via a post on LinkedIn.

Basically, they want an algorithm designed to identify Rhino's and other animals from drone footage.

The footage they provide isn't ideal, and it looks like we'll only be able to use either normal or IR at a time for the contest because we don't have synced video. The artifacts on the outer borders are also going to be a pain.

http://www.youtube.com/watch?v=1SBMxizOPtg


My basic plan at this stage is to look for things that have a different visual flow, and then cut them out to compare to a database of existing elements, which should be able to ID them as Rhino or No. Ideally it'll also track the ones it has checked, and prompt for user agreement if the match is not great, If we can also add in new animals in the same way that too would be ideal.

Looks like a fun challenge, they have no preference for language, but want it to be implemented most easily in future, but can't tell us what platform things are on... I might stick to matlab and assume not live footage as it will be easier for me.